Showing posts with label Decorating. Show all posts

Tuesday, September 4, 2012

Coming right along

The office is really starting to get there.  On Sunday I had Zac and Dad rearrange the tables into their bays.  This is one of the adjusting bays.  The bays are pretty simple.  Just a table and a little hook for my patients to hang up their purses/coats.  I just gotta hang the hooks...after I buy them.
And vacuum the bays, after I get a vacuum...


This is a table that was given to me by a friend.  It was incredibly generous of her.  It's not new, it's not beautiful, but it is perfect for what I need and I know my patients don't care if the foot piece is a different color.  Besides, a neutral and red is quite chic.  Shut up.  It is.  

 I have ordered a new table that will go in the other bay.  It won't be here for a cool month.  That's how table companies roll. 


I also have the start of the therapy bay.  It is completely covered in tools and things that need to make their way out of the office.  I still need a fridge, and a hot pack warmer, but I am dragging my feet placing the order for all of it.  I am VERY aware of where my start up costs are at...and even though I haven't even hit 50% of what I estimated yet, that table I ordered is expensive.   And an x-ray unit...holy big bill.  But, I will use them.  It's just, really, I hate the thought of the extra debt, so I've been putting off the expensive stuff.  It makes no real sense...but it is the case.  


My front desk is really becoming a front desk.  
I had Zac put up a lower shelf so there is a more comfortable height for writing and setting down purses.  I had to have my Aunt Jackie be the judge of where it would go.  I need the opinion of a short person.   Zac and I don't fit that bill.

Oh my goodness...I just realized how grey the office still looks.
It won't always.
I promise.
For now it's just, "Hello! Welcome to my office.  I have a great personality, isn't it obvious."


I also moved in my waiting room chairs.  Aren't they fab?  I love that they are so bright and fun.  I have some more furniture to move in, display and decorate.  Plus I need to replace the blinds and hang curtains but I haven't found the right fabric yet.  I saw the right fabric...in a strangers studio.  I love it, but have no idea where to find it.  
I dig it.  It could be perfect.  


Do you have it?  If you have the right fabric, you better hand it over!


Behind my front desk is really where things start to look official.  Zac came and hooked up the computer.  Well, he started it.  There is still lots to be done and we are waiting on my laptop to be shipped.  But, I got to do a little bit of the fun stuff and put out office supplies.  I will have one station that runs the computer.  

And the other side of the "L" will have plenty of space for paperwork.  


Tucked behind the desk is the printer.  See the water shut-off's, they will be hidden by the printer cart I built.  I took pictures of the cart building process, so you will all be pumped for that cart to be in place I'm sure!


I also did just a little bit of work on my "private" office.
Somehow I got super lucky and found these 2 blue chairs, that are very similar to my waiting room chairs, at a thrift store about 20 minutes from Shelbyville.  The best part, they were 50% off...making them $4 a piece.  You can't beat that!
I gave them a good scrub, but they could use another.  I figured I would wait until my Cliffbelly is out of the way before I attempt it again. 


The desk is now in place too.  
I have a big cabinet from my uncle that will go behind my desk to store all of the reference books I have.  It needs a little TLC first.  I also have plans for that little white chair you barely see in the corner of the picture.  It is from my house....and was living at the office because I needed it out of the way, but I've thought about it, and decided it will be tucked into the corner, sort of behind the door, so that way I have a place to feed Cliff, or pump in peace.  Crazy that I have to consider those things now...


All in all, I'm feeling really good about where the office is at.  I can picture in my mind how it can and will look finished.  It's a little intimidating because I know I have a ways to go, but I also know how to get there, and that's what is important.  

Here's to the office!  Cliff is gonna learn to love it there!  He will make a great Chiropractor :)


Saturday, September 1, 2012

Man up


As you all know I have been working for months to have my house ready for baby Clifford.  One of the last things I needed to do was evict his dad from his bathroom.  Not hard right?  Wrong.  
Zac is so stubborn (not that I am...or Cliff is)!  
Since our master bedroom is open to the bathroom, Zac always got ready in the guest bathroom.
I assured him he didn't have to, I was up anyway.  
He insisted.  Which drove me crazy, because that also meant he always left his toothbrush and his man products on the counter.  I always had to clean them up when anyone came over.  Plus, somehow the man has like 3 sets of trimmers/clippers and they all found their way under the vanity...or on the vanity. 

I warned Zac he would have to quit that.  The bathroom is small, and the little vanity has just 2 drawers and a little space behind 2 doors.  Due to my mega aversion to toilet paper holders...we were down to 1 drawer, which needed to belong to Cliff.  

I seriously moved Zac out, and back into our bathroom 4 times at a minimum.  
I think it may have actually been 5.  
After the last time I told him if he tried to move back in, I was going to get mean....I would start deleting movies from his hard drive.  For those of you that know Zac, this is a very serious offense.  He, so far, has stayed "moved out." 
Threats work people.  
Turns out, sometimes marriage is about frivolous threats.
I don't regret ransom-ing his movies.  Not one bit. 

Anyway, back to the reason for this post. 
Previously the guest bathroom had been a little girly.  Well, a lot girly.  
I had a shower curtain I found at the thrift store that was a floral pattern from the seventies, all hot pink and orange and green.  It was fab.  
Plus it went great with some super pink towels.  (Funny that it was "Zac's" bathroom, but he can't care about color schemes...)
I knew pink wouldn't do for Cliff.  We needed this bathroom to "man up."
I looked online through curtains and didnt' find any that really blew my skirt up, so I figured I would just make one.  I had fabric in mind.  
I don't know about you guys, but I am loving chevron fabric!
I used grey and white on the back of Cliff's crib quilt and knew it could make a great graphic curtain for him and work with lots of colors so I wouldn't get too sick of it.  
Now it was just time to chevron up!
This is his new bathroom.


For those of you that aren't big sewers, curtains are super simple.   Literally, fold and sew a straight line.  Before you know it, BAM curtain time.  
I decided to get a little crazy and sew button holes into my curtain for the rings.  Talk about a pain!  It is not that the process was hard...since my machine's button thing is fully automated.  It was my own incompetence.  I couldn't find my manual that said how to use the button hole maker.
Then I spent an entire hour misreading the directions from the manual I downloaded.
Then I couldn't measure because my pregnant brain can't do math at this point.  I literally had to ask Zac for help....and draw a diagram, to make sure I did it correctly.  It was lame...a lame word problem...

"if your curtain is 90 inches wide and there are 12 curtain rings, with the first and last rings starting 1 inch from the edge how far apart do your button holes need to be to make the rings evenly spaced?"

See...you would have drawn it out too.
(In math class, they now call word problems "critical thinking."  I don't think any school math problem qualifies as "critical" but the irony of being unable to perform critical thinking was not lost on me.)

The point is, I button-holed the heck out of that shower curtain and now it looks awesome. 


I got the rug right the first time, but not the towels.  
I had bought fab ones that I loved from Kohls...and then the lighting in the bathroom made them look a funny color.  I returned them, and bought 6 more towels.  I returned 4 of those...and bought 2 more.
I am a girl with opinions people!  I need options!

(Thank you Kohl's for your easy returns process.  It allows me to be completely fickle with zero consequence.  Turns out, I appreciate that. ) 


After 4 tries, orange and grey it is!
I am very happy with it. 
The bathroom is super manly.  And now, super ready for Cliff Stu! 


Sunday, August 12, 2012

Clifford's Nursery!

I have finally, really, finished Clifford's room.  I am so glad!  The OCD planner in me wanted it done forever ago, but sometimes things just come together in bits and pieces.  Especially when you are buying things as you are able, and refinishing what you have.  In the end, I think it is so adorable.  
So get your cup of coffee ready, sit back, and enjoy the walk (well, slow rotation) through Clifford's nursery.

This is what you see when you enter from the hall.


On the right are the paintings I made for him and a storage ottoman.
I would like one more pillow...an orange one I think, but haven't brought myself to dig through my storage tubs in the shed to find one yet.  
Sometimes I find desire is trumped by laziness...at least when it comes to pillows. 


This is obviously his dresser/changing table.  My best friend gave it to me and I used it in my room for about a year but decided it would make an excellent piece for Ford.  Next to it is a little bookshelf that I bought at Third Sunday Market in Bloomington.  (Again, if you haven't gone, GO!  There are so many vendors you are sure to find amazing things and then you will end up with your Dad's barn full of furniture just waiting on you to live somewhere other than a trailer.  Well, maybe not that exactly, but you will find great things.)
The chair was a shower gift from my sneaky Aunt Jackie.  She and mom called from IKEA about it.  We hem-hawed over buying it.   They said they passed.  They lie like rugs. 


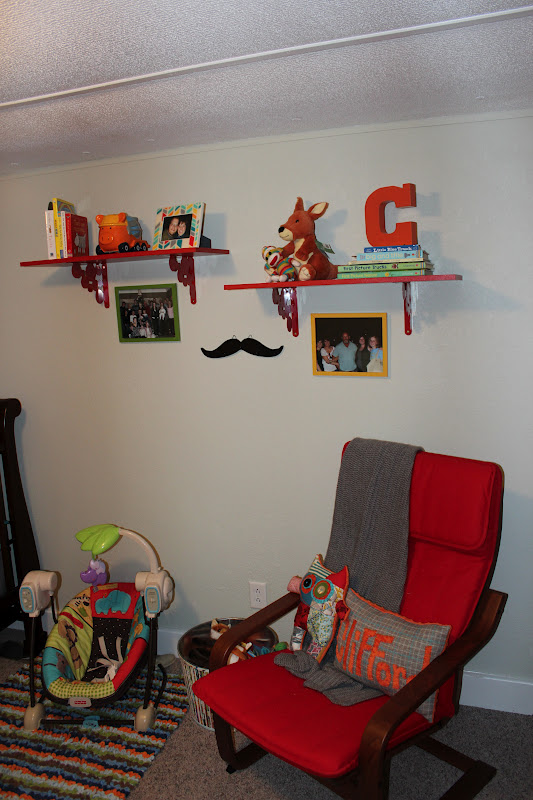
To the left from there are his shelves and toys.  
Notice the monster that sits in his chair.  It is from my friend Darby.  She makes handmade goods (including bunnies and elephants and owls that are girlie versions of the monster) that are just perfection.  I mean really, could that monster  BE any more fab.  No.  Check her out online at Underground Vintage to see the whole array of things she creates and prepare to fall in love with stuffed animals...well beyond an appropriate age to do so.


 On his shelves he has a few other books and toys, including the construction pig piggy bank that his Great Grandma Betty got for him.  She put some pennies in already to get him started and so it would make much more interesting sounds when he shakes it.  


He also had to have pictures of his family.  
Can't forget where you come from....otherwise you might not understand why you are a little crazy :)
He got a big picture of the Ballard's and his grandparents and aunties on my side, as well as a picture from the night I told Zac I was pregnant.  As you may remember....he "congratulated" me. 


And, of course, no baby's room is complete without a crib.
(and a lovely wall mounted monitor that photographs oh so well)


Zac's sisters had these awesome letters printed for my shower.  The didn't end up using them so they handed them over.  I knew they would be perfect.  It was just a matter of finding 8 inexpensive frames....thank you Family Dollar!  With a little bit of spray paint, a level, and some patience, I hung his entire name CLIFFORD across the wall, only to discover that the frames, while all the same size, did not have the little hanger hooks mounted in the same spot on the back, so my level nails, made an unlevel name.  Obnoxious.  In the end, his full name looked too long on the short wall anyway.  

So for now, it will say Cliff.
We will see if he gets here and looks more like a Ford. 


There ya have it.  My little man's nursery is fully prepared to be slept in, drooled on, and probably peed all over.  Tomorrow I am 38 weeks along, so it shouldn't be too long now.  


I hope you enjoyed the tour of Cliff Stu's room.  
I love it.  
I think it's pretty perfect.

Now to find a magazine interested in coming to photograph a nursery inside of a mobile home for it's pages.  
I am thinking Traditional Home will be interested....


Tuesday, July 3, 2012

The itch...


Anyone that knows my mom, knows the woman cannot stop decorating.  I am afraid that she passed it on....it is frustrating.  It makes you do silly things.  Like believe that your living room must be rearrange RIGHT NOW!  Then you are thrilled that most of your furniture is fairly light weight, so you and your Cliff belly can push and pull it around without a helping hand. 

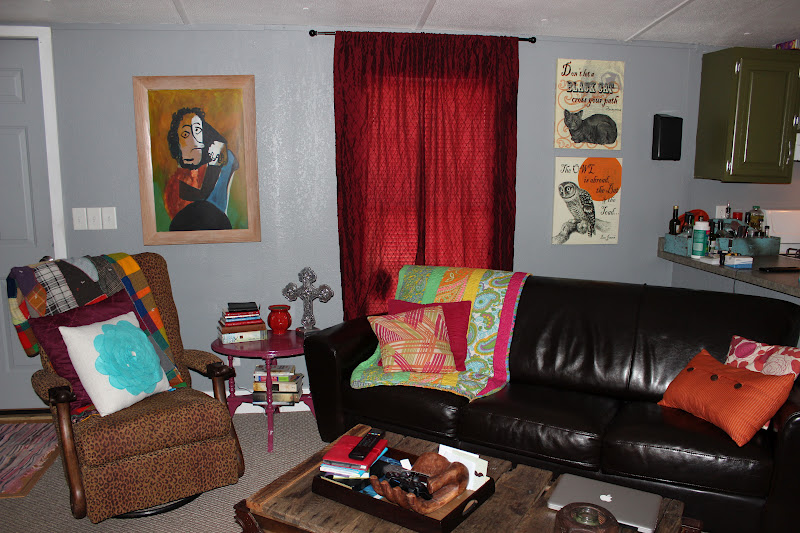
This was my living room before. 

Side one


The wall of electronics that I would not be touching...


And side two.

Ignore the pile of crap you see behind the leopard chair.  I like to make piles of stuff to work on...

So that is what my living room looked like.  I asked Mom to come help me rearrange...she insisted the place looked fine and needed no changing.  I disagreed.

I also have a bit of a problem.  The leather couch that I got 7 years ago, is cracking and tearing.  It pisses me off.  Just the thought of it.  I hate being at the point I am in life (27, married, baby on the way, etc) and owning furniture that has tape on it.  Just irritating.  Irritating that it the couch didn't hold up.  Irritating that the company won't honor the warranty.
Irritating that I need to rearrange my furniture so we start using the less damaged side more.
Irritating.

So that was my dilemma.  Let the redecorating begin!


I basically just flipped the room...Side two now


Side two


Untouched electronics...as promised.


Side one


And my kitchen....don't know why I included this picture.  Honestly, no idea, but I'm gonna let it ride.


Mom did come and help me move things around a bit.
She hated it.
Not just the helping, but the new layout.  "Not good" she says. "Much better the other way."  I can't care.  It HAD to be done, it is staying!
I like it.  It will grow on Mom.  If not, well, she can't see it from her house.


PS thanks for your help ma.  I appreciate you and your little arm. 

Tuesday, June 5, 2012

Rearranged

As I mentioned, I had been looking for a lovely new dresser to complement my handsome man dresser.  I had the grand plan to move the big dresser in my room into Ford's nursery.  And I did just that.  

This man-dresser moved into the master.  


Now, the big dresser is in the nursery.  Once that happened, I had to move the crib and move the room all around.  The crib is on the small wall, the dresser under the window.  It is cute!  

Cliff's room looked like this...

 and this


Now, it looks like this. 
 I think I am gonna paint the dresser orange, and hang a grey curtain behind it.  I like the bookshelf I bought the color it is.  My best friend came and looked.  She agreed.  She was adamant that the bookshelf was a "cuter" green.  Now it's project time, paint-a-dresser project time. 
If you'd like to do it for me, you are welcome to.  


This is Cliff's crib on the other wall now.  I have to come up with a project for above his crib.  I think maybe a pendant bunting with his name made with left over fabric scraps from his crib and play quilt.
Maybe some paintings on the wall above the ottoman you can barely see in the picture above this.    


Oh who knows...I have a thousand things to do still.  Dresser painting is at the top of the list.  Then client paintings, then Cliff Stu paintings.  With so few hours in the day, what's a girl supposed to do.  
I'll post pictures when I'm done.  Of course.  For now, enjoy your updated view of my nursery :)

Monday, May 14, 2012

DIY Crib sheet time!

In my post about Cliff's room from the other day, I mentioned that I was planning on sewing the crib sheets for his bed.  I looked online plenty, but the sheets were like $20-$25 for the colors I wanted.  I figured that I could sew a straight line....so I could surely sew a sheet.  Turns out, I was right!  They turned out great, and now, lucky you, this is a mini-tutorial.  All you need to sew a crib sheet is a 70"x45" piece of fabric, a 90" piece of elastic, a measuring tape, scissors and thread.  

I started with a twin sized flat sheet.  I needed a piece of fabric that was 70x45.  To do that with a flat sheet, I folded it in half, pinned the edge and repeated.  Once my sheet was in quarters, I measured, marked, and cut.  


After you have a 70x45 piece of fabric, you need to cut the corners out of the big square.  Measure a 9x9 inch square and do away with it.  


This is what it looks like. 


And again in orange. 


Next, you bring the right sides of the fabric together and then sew a straight line to form the corners of the crib sheet.  


Since the corners are stress points, I sewed once with just a straight stitch, and then came back and did a second zig-zaggy stitch to reinforce it.  


This is what the corners looked like when I was done. 


The next step was to finish the edges of the sheet.  I decided to do elastic all the way around the sheet, so I needed to create a pocket for the elastic.  

First I folded over each edge by about 1/4 of an inch.  I did the grey sheet in its entirety first, with meticulous measuring.  Let me just say, NOT worth the extra time, effort, and measuring.  Just eyeball it, unless you are terrible about estimating....then measure it.  

Anyway, fold over and sew at about 1/4 inch first.  


After the 1/4 inch seam is in place, fold over again to 1/2 an inch and throw in another seam.  I really just eyed it.  I knew I wanted it to be deep enough that I could run the head of a big safety pin through the pocket, so that's what I shot for.  


Sew all the way around the 4 sides of the crib sheet and end the seam about a 1/2 inch or so from where you started the seam.  I marked this space with a clip while I prepped the elastic.  


My elastic was just 72" long, so I had to cut and sew together 2 pieces.  I just used my machine and stitched it forward, then reverse, then forward again to make the "joint" was sturdy.  


Next I pinned one end of the elastic to the opening in the seam (so it wouldn't pull through at the end) and pinned the other end to start feeding in through the pocket I made. 


Then I scrunched and pulled and scooted my way around the entire sheet. 


Once I got to the end, I pulled my ends together, 


then stitched them together, and then sewed that small opening closed to finish off the sheet.  


From there, it was just a matter of checking the fit and celebrating that I had actually made my crib sheets!

This is what the corner seam looks like. 


My sheet on the mattress from the front....


and the back.  (That's a shadow...not a giant stain on the mattress)


This is my grey sheet, 


my orange sheet, 


and my turquoise sheet! 


Soon I will be starting Clifford's quilt.  I can't wait for it to be in the crib, with the bumpers sewn.  Can't wait!
(This is my sheet, with a crib quilt I made in the past.  Isn't it cute?!)


 I am happy with my crib sheets.  I whipped out 3 in an afternoon so I consider that darn productive.  The best part...it cost me about $19 for all of them.  I must say, I am impressed with myself.  I never know just how things are gonna go when I just up and decide I am capable of doing things.  Now I feel inspired enough to sew my own dust ruffle.  Get excited folks!  It's ruffle time!


P.S.  Please ignore my terrible picture taking.  I realized after the fact, that I had my settings wrong...which is why they kinda suck and are dark. 

Related Posts with Thumbnails